Creating a Safe & Fun Playroom
Moving comes with sacrifices. It’s almost impossible to find every feature you want in one house so you have pick and choose what’s most important to you and loose a little to gain in other places. That was the case when we made our move last spring. We were once living in luxury with a basement that had simple things that I once took for granted….like flooring, walls and paint! We now have a basement with a cement floor, plastic walls, duct work exposed in the ceiling and lovely features like a furnace, hot water heater and sump pump.
Although we lost our finished basement, we were optimistic that we could find some solutions and transform the cold drab basement into a safe, bright and cheery play space that the kids could enjoy. There was no way we were going to miss out on using all of that extra square footage just because there was a sump pump in the room. Whether you are facing the circumstances we did or if you are looking for some ideas to update your existing play space, I hope these tips will serve as some inspiration for you!
Furniture & Layout
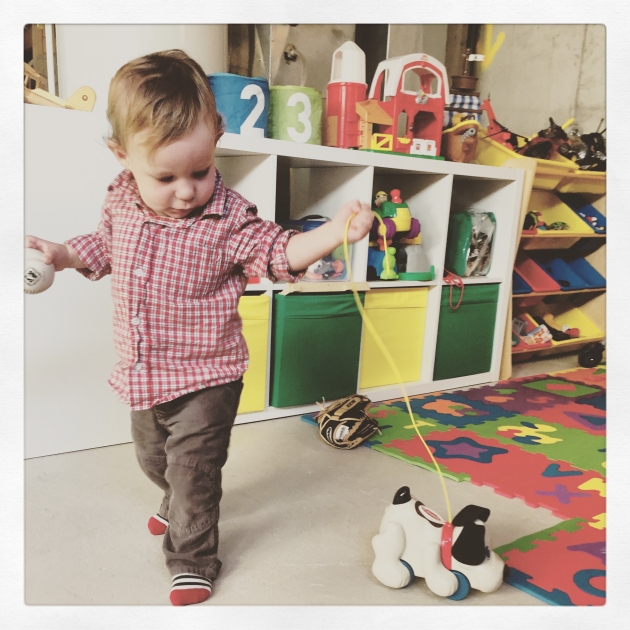
Assess your space and needs and put some time into planning. We had the challenge of creating a safe play space around a large furnace, hot water tank and sump pump that sat right in the middle of the room. We tried our best to use our existing furniture when planning our layout but came up with the idea of creating a wall or barrier around these unsafe but necessary structures by using furniture. We had very few places to secure tall furniture here and had to keep the furniture a reasonable distance from the appliances while ensuring the barrier would be tall enough to keep the kids out. We found very reasonably priced KALLAX shelving units at Ikea and when turned on their side, created a perfect wall!
Although it took a fair investment in time and patience to put them all together, the furniture has stood up to child play and looks stylish. We went with simple white knowing someday  we may like to re- purpose these shelves, but the options were endless. You can get many sizes, colors and there are lots of coordinating inserts, boxes, bins and baskets to choose from to compliment your style and space.
We also used the KALLAX units to divide the big kid play area from the little kid play area. With this divide, the big kids can create elaborate hot wheels tracks and leave them in tact without baby Godzilla coming through to destroy them. This also prevents the worry of small Lego pieces being swallowed if dropped on the floor since we keep the Lego on the big kid side.
Lighting
Build your space around the natural light in the room. We had two small windows that would get a flood of glorious sunshine at certain times of the day. We positioned the main play stations around this naturally lit area of the room.
Position accent lighting to brighten up dark corners. We were able to rig up a fun and colorful lighting solution in a dark cement corner using some paper lanterns. We ran an extension cord through the  open ceiling to the electrical outlet on the other side of the room since there were no outlets nearby.
Floor lamps are great for redirecting the light where it’s needed most. We used a floor lamp in the corner close to the Lego table, game table and easel so we could easily direct the light to where the action was happening.
Safety First
We put so much thought into layout and incorporated our concern for safety into our plans. For example, we strategically positioned shelves along the walls next to some of the pipes that come out of the floor to eliminate tripping hazards. Since tall shelves cannot be secured properly to a plastic wall, we positioned them next to vertical piping and attached them to the pipes with industrial zip ties. We also installed a baby monitor to keep our ears on the kids when they are playing independently.
Embrace the Space
Don’t let an unfinished space limit you… open yourself up to possibilities that wouldn’t exist if the space were finished!
 We took advantage of the cement floor and used painters tape to create a semi-permanent hopscotch game.
We used the exposed wooden beams in the ceiling for hanging decor. I was able to attach bright and cheery pendant flags from the wooden ceiling beams using simple thumb tacks. It made the room seem taller and drew attention away from the exposed duct work.
We used the same approach in creating a gallery wall to display the kids art work. We tacked twine to the ceiling beams on either side of the room and created a clothesline along the longest wall in the room. This took advantage of the vertical space in the room and replaced the need to hang wall art. The kids look forward to displaying their creations and their unique masterpieces become the rooms decor.
Check out the other posts in this series:





Hi there my name is Barbara and I live in ON, Canada with my husband, our 3 years old son and we are expecting our second boy in mid-October. I was so excited to see your post because we have done the same in our house. The main difference is that I also have one of the Ikea shelves but I keep upstairs in the main floor.
We have most of the big toys in the basement but I decided to keep the shelve with the baskets in the main floor as I find that when I am upstairs cooking he needs toys in there with him. Having said that he is now 3 so I may copy your idea of placing a monitor in case he wants to go down on his own.
Your playroom look amazing! you have done a great job. My question to you is, do still have toys in the main floor or their bedrooms? I am wondering how do you deal with hem as you are doing stuff in the kitchen? Do the boys go downstairs on their own? or do you also keep stuff upstairs?
Thank you so much in advance and happy playing time!
Barbara